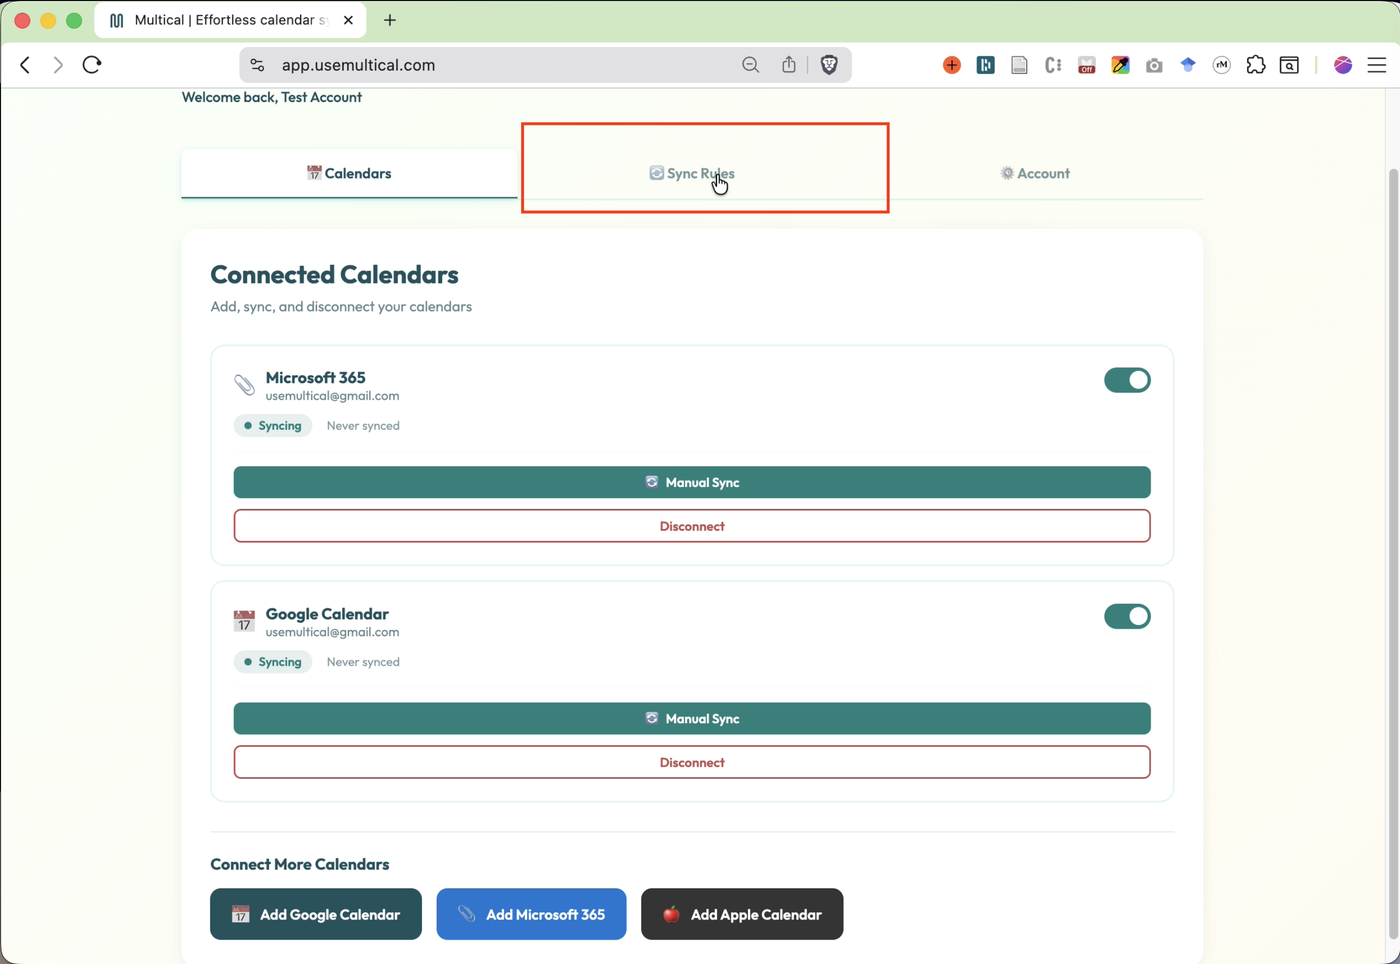
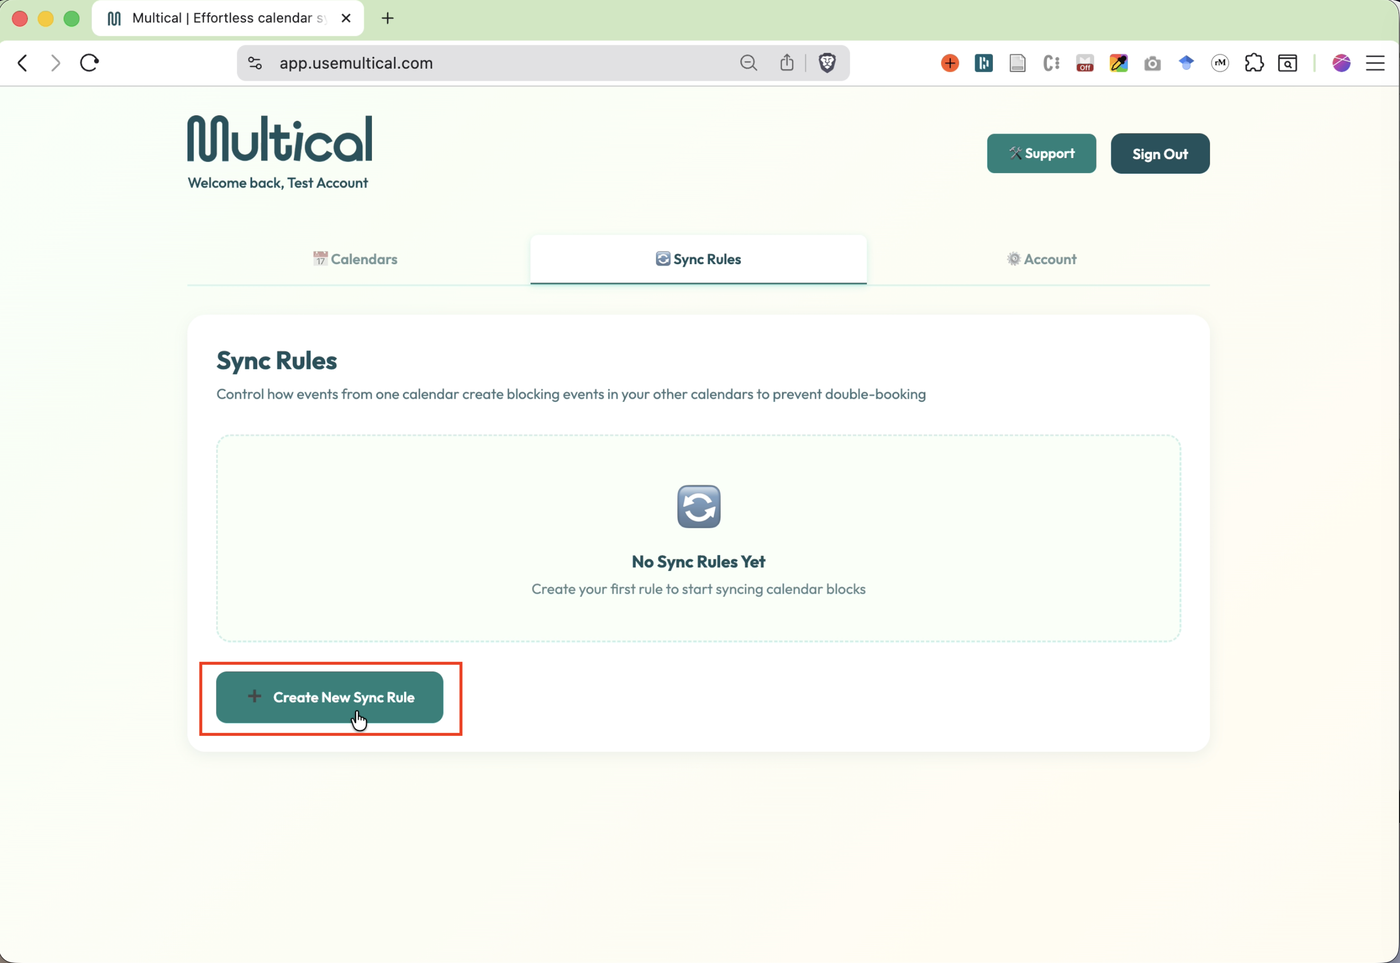
Click on the Sync Rules tab in the top menu
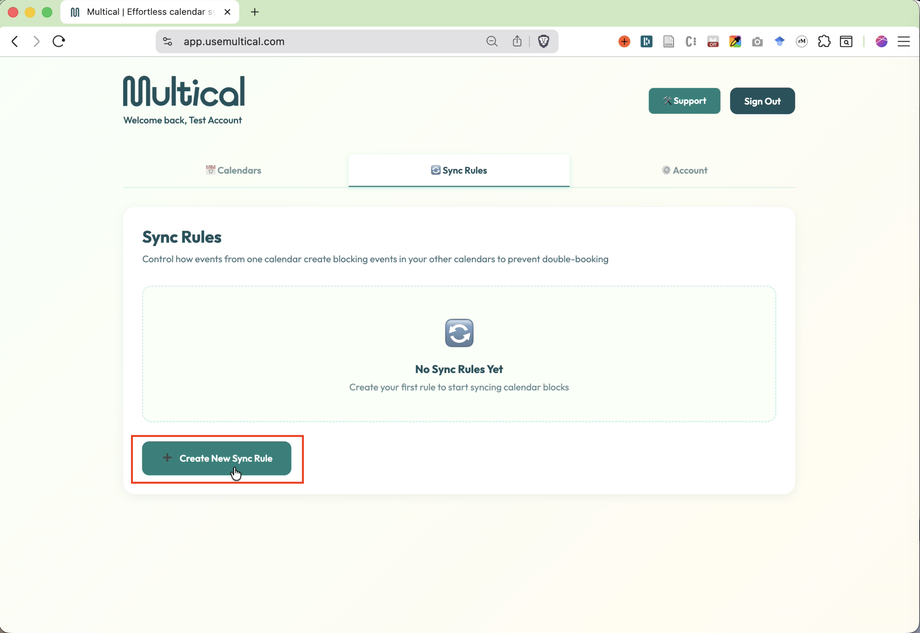
Click Create New Sync Rule
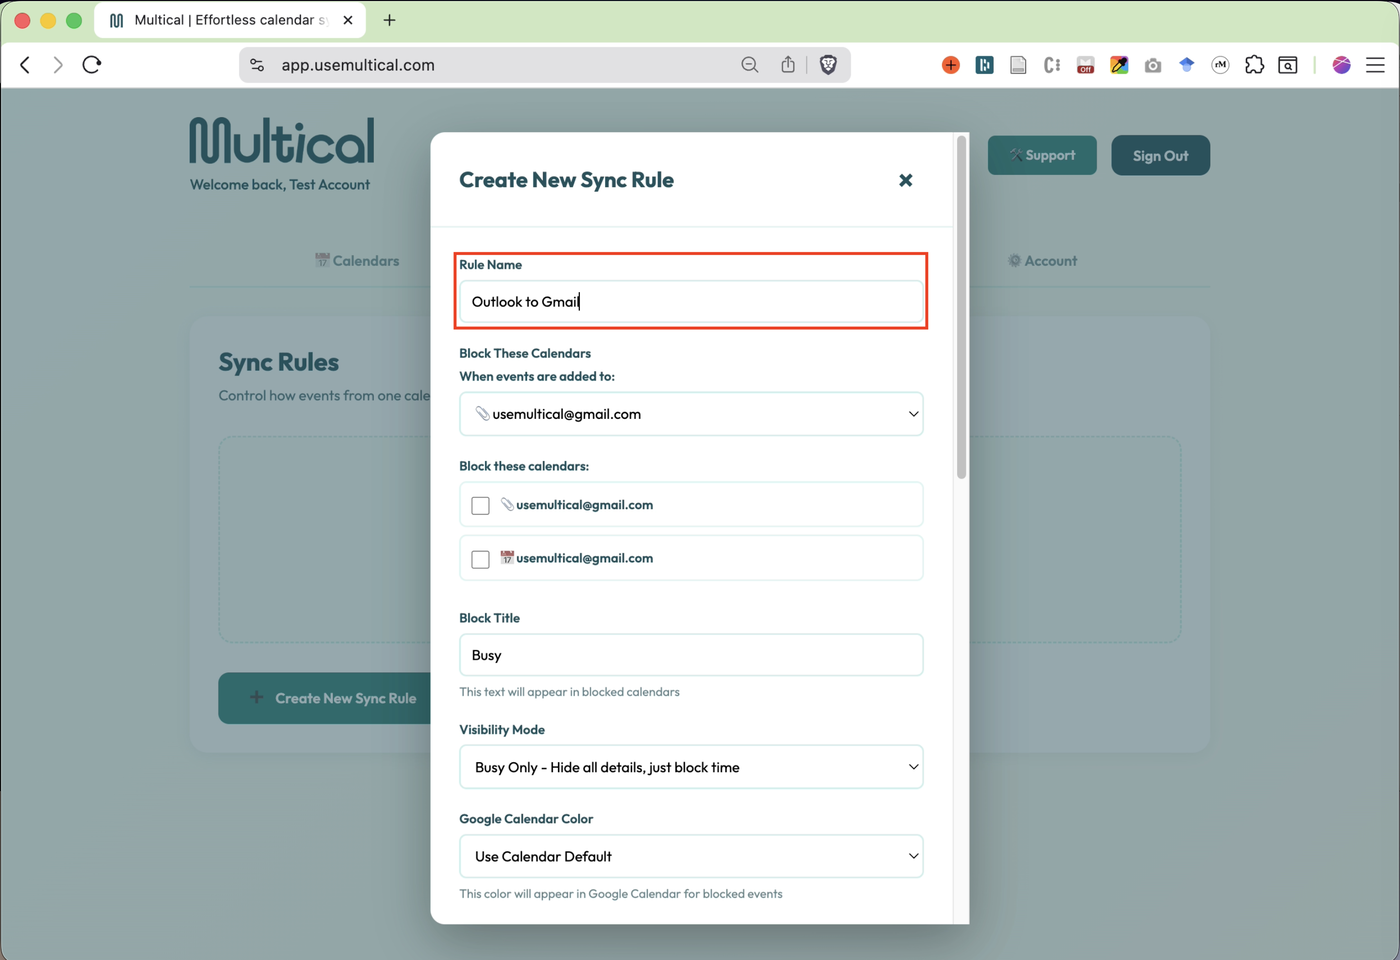
Name your rule
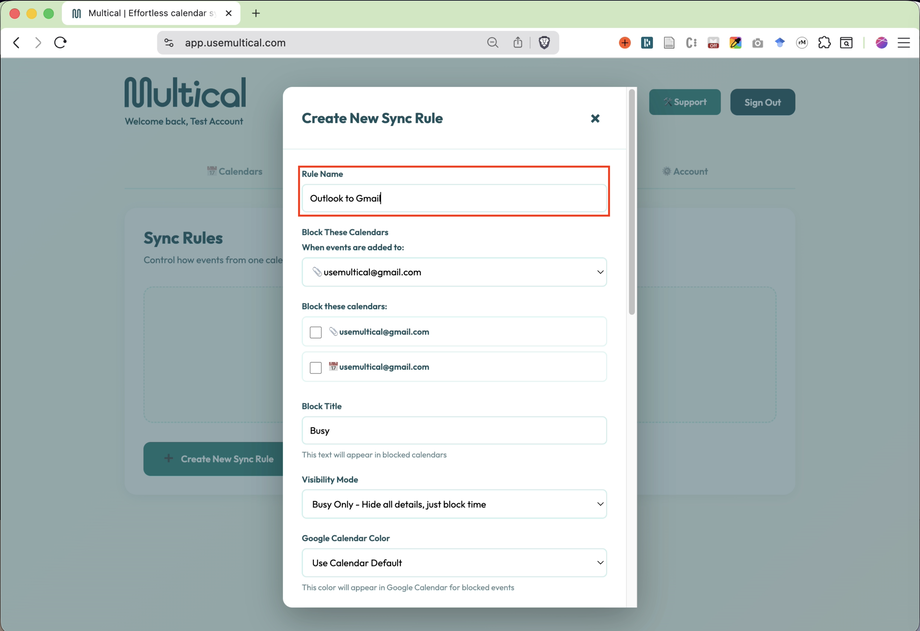
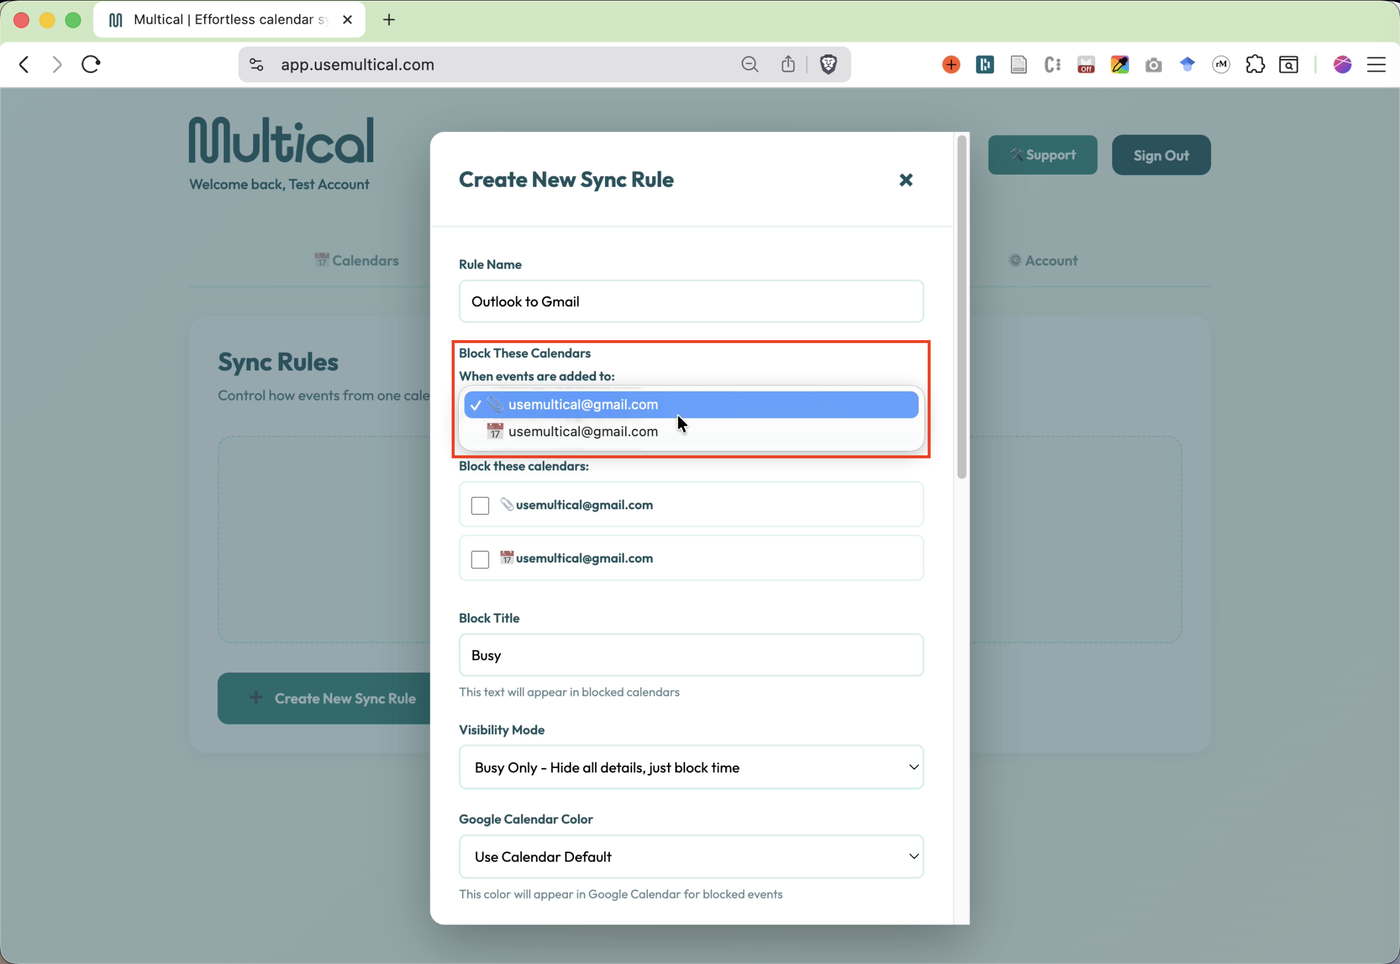
Choose your source calendar.
Note: Sometimes calendars from different provides may share the same email. In those cases, use the emojis to distinguish. Multical uses 📆 for Google calendars, 📎 for Microsoft calendars, and 🍎 for Apple calendars.
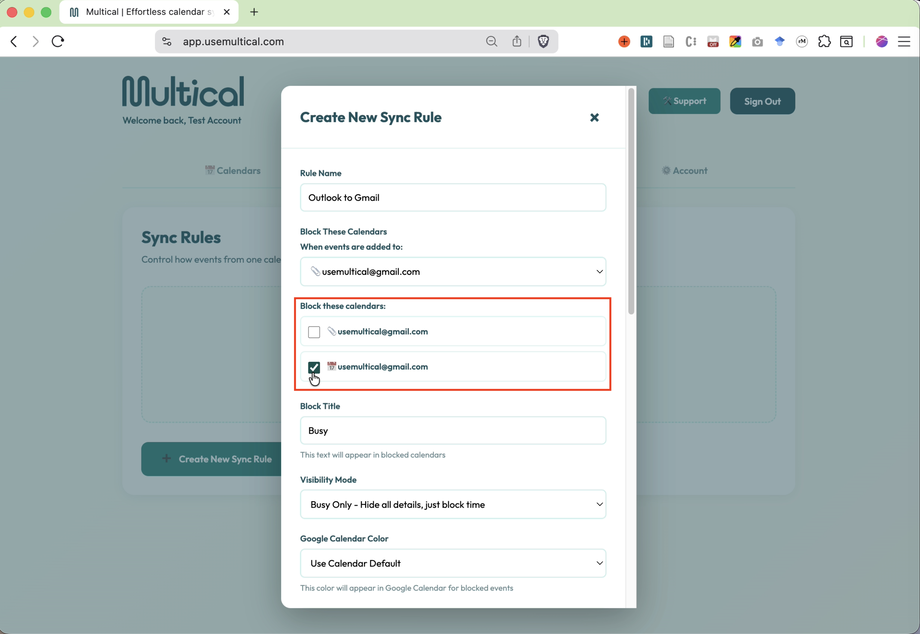
Select your target calendar, the calendar to which events will be synced.
Choose the event name that will be shown when syncing in Busy Only mode.
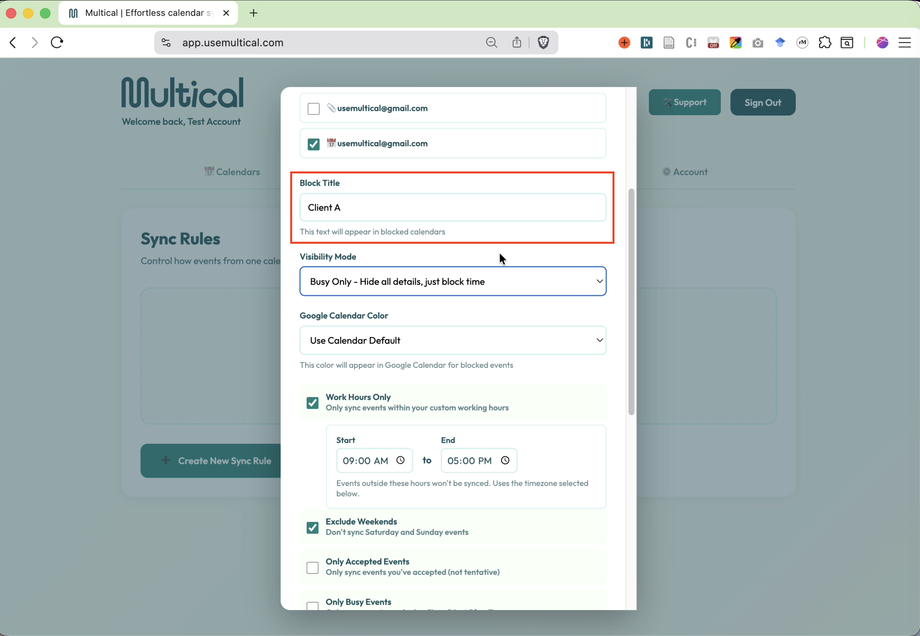
Choose your Visibility Mode.
Busy only - Just blocks the time, using your Block Title as a tile
Title only - Shows original title of the event without showing any details
Full details - Shows the entire calendar event


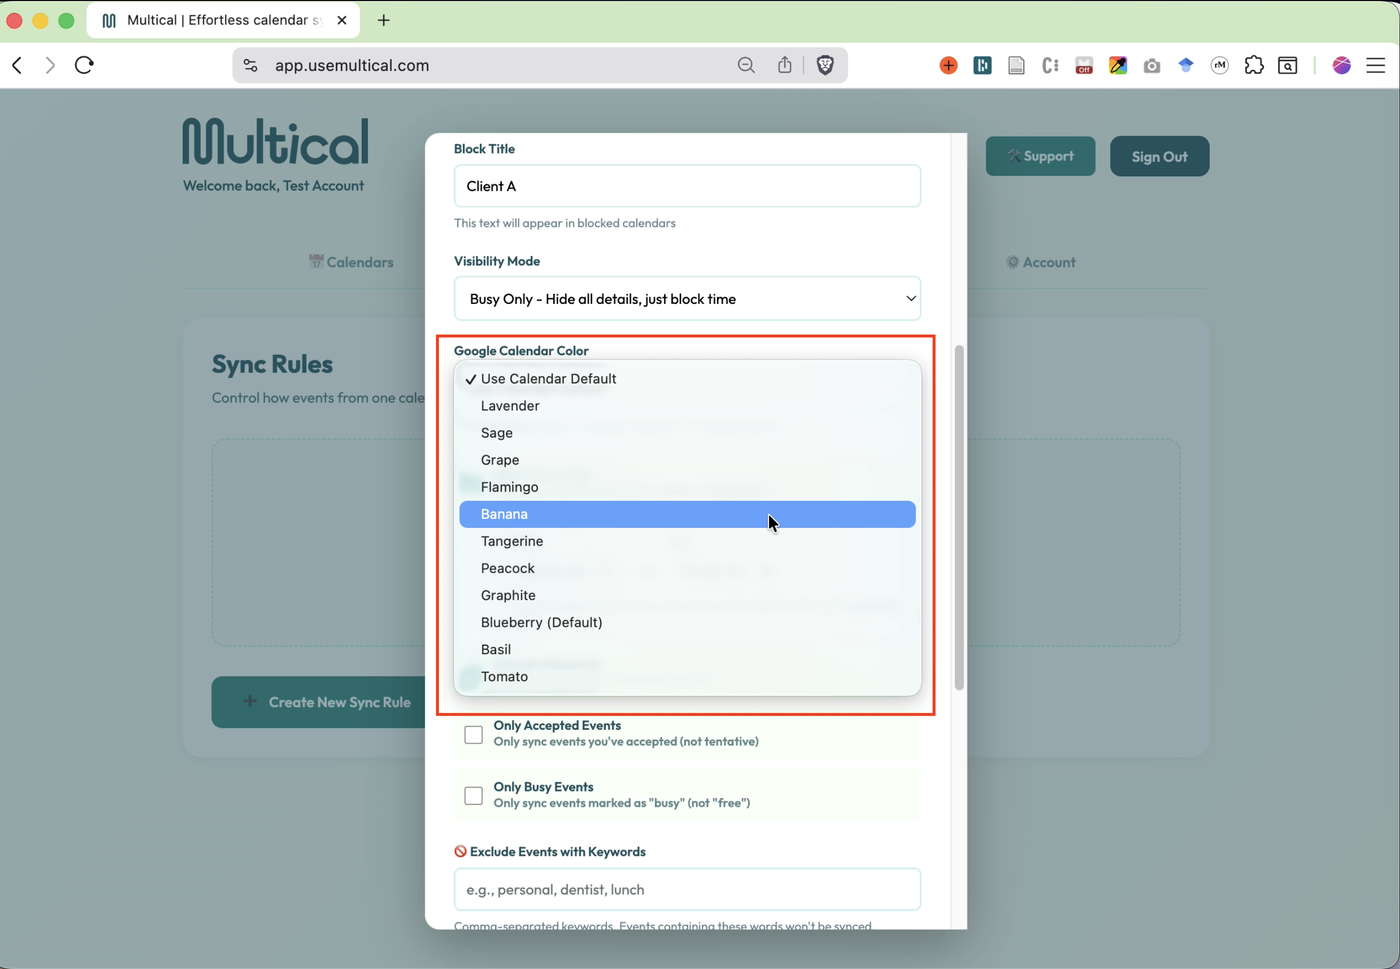
Choose what color your event blocks will be.
Note: This only works for Google Calendar.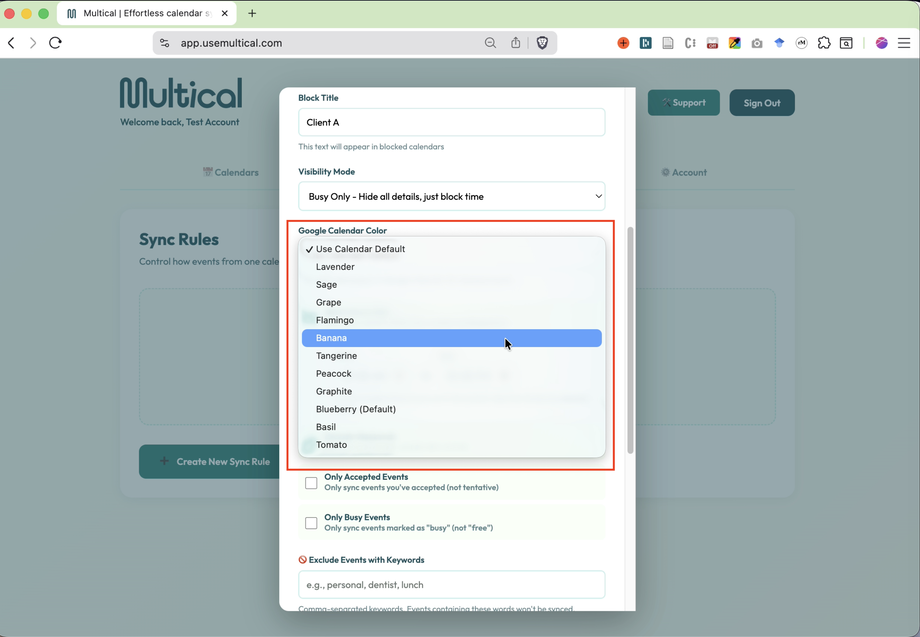
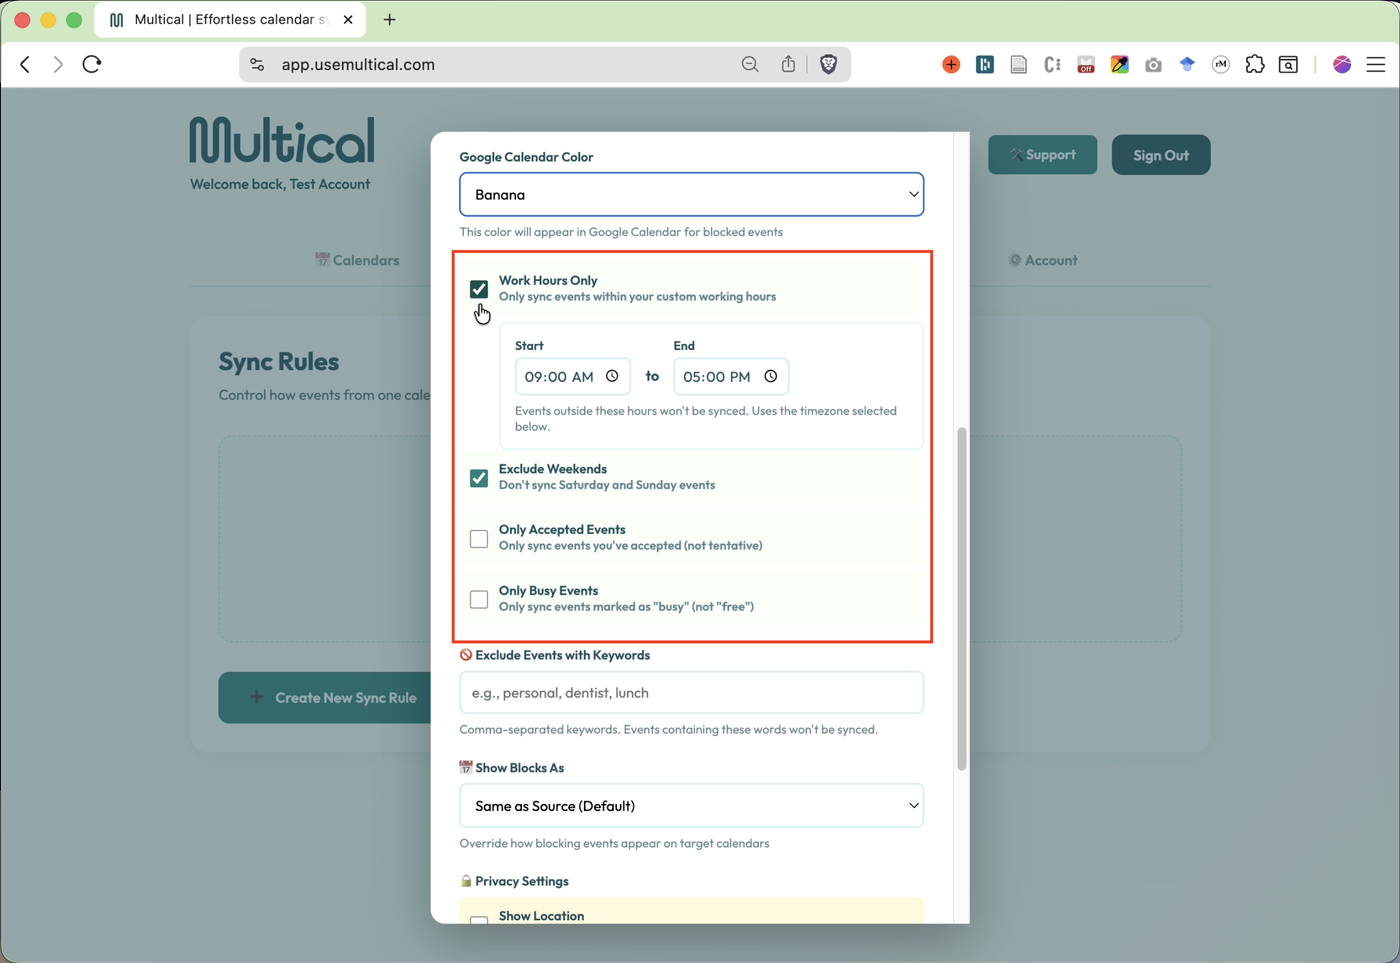
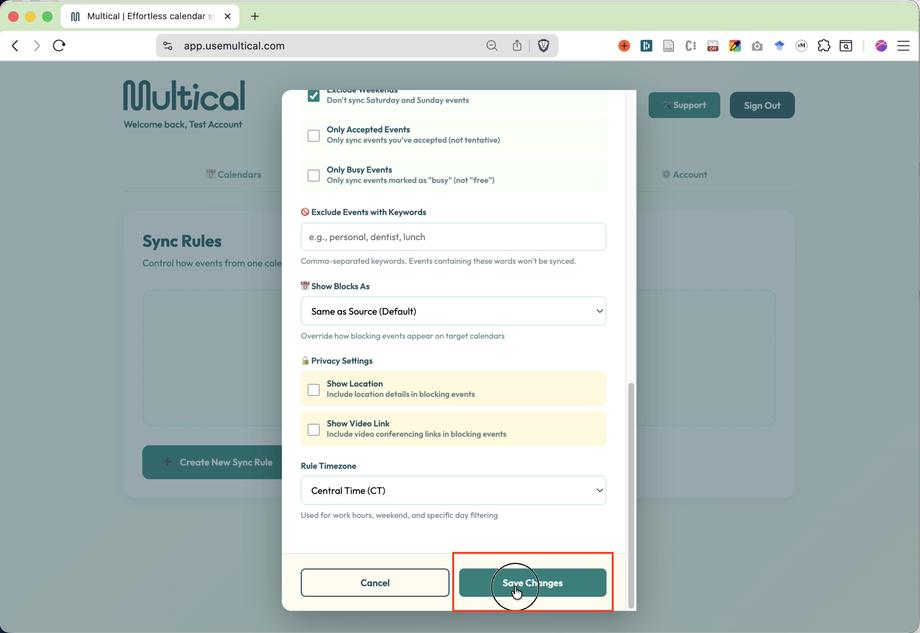
9. Decide when and how to sync.Choose your work hours and if you’d like to only sync during them
Decide whether or not to sync on weekends
Decide whether or not to sync only events you’ve accepted on the source calendar
Decide whether or not to sync only events marked as busy on the source calendar
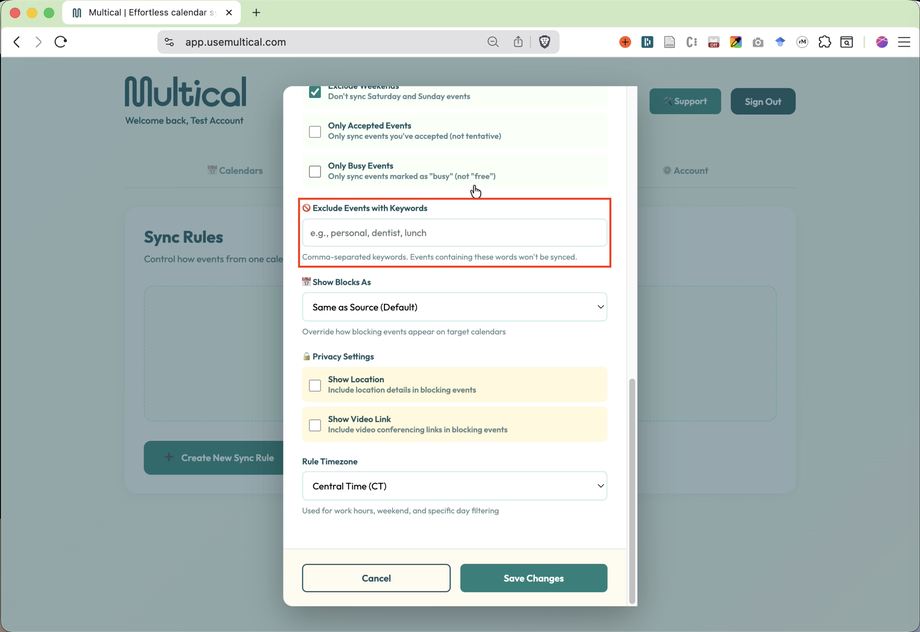
Define any keywords that you would like to use as a signal to skip syncing an event from the source calendar.
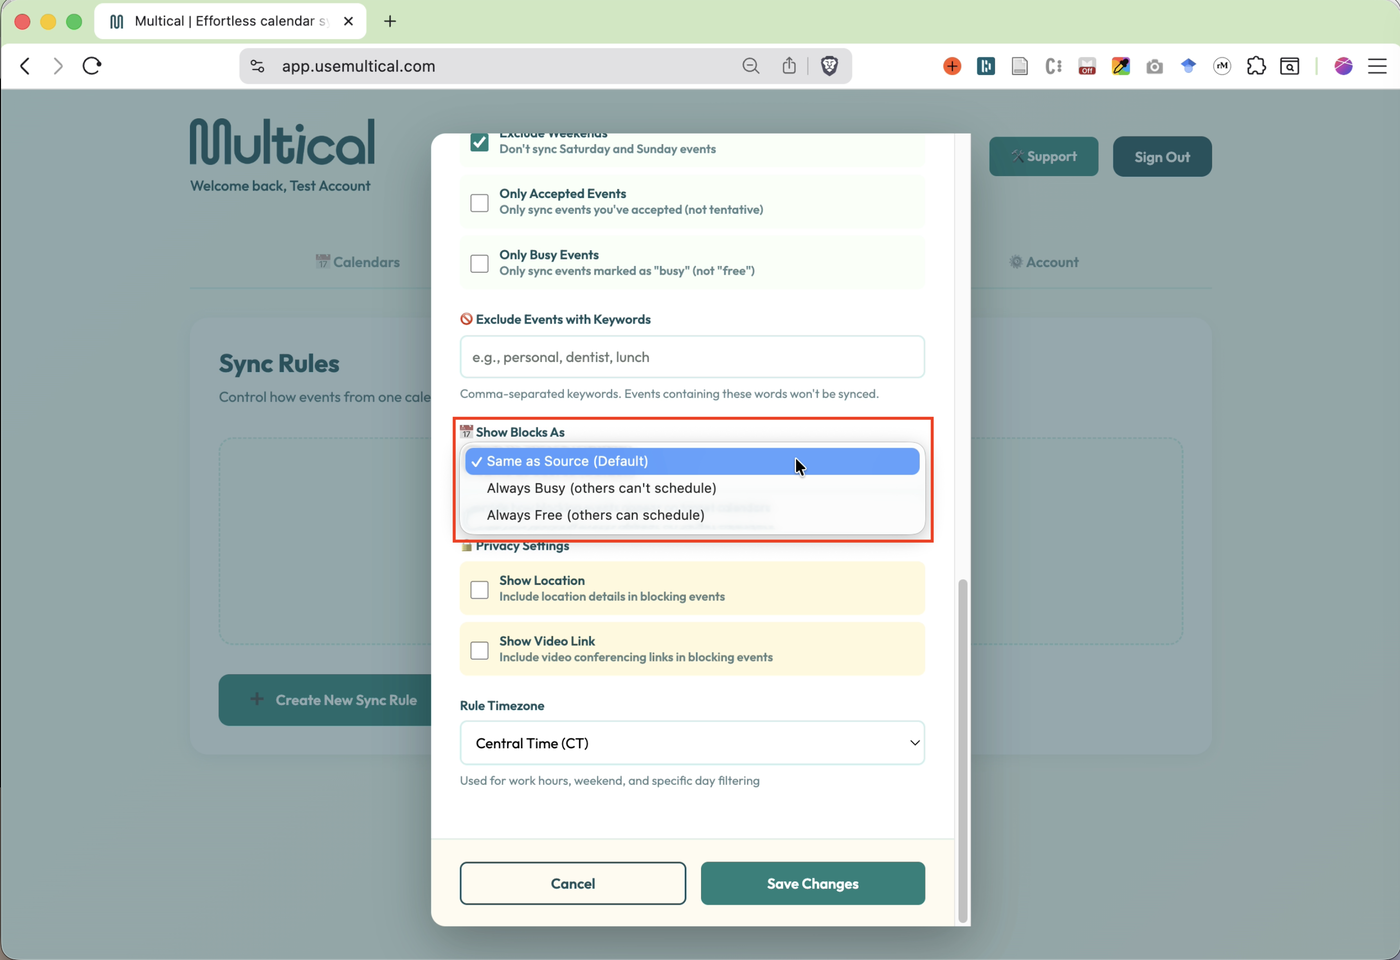
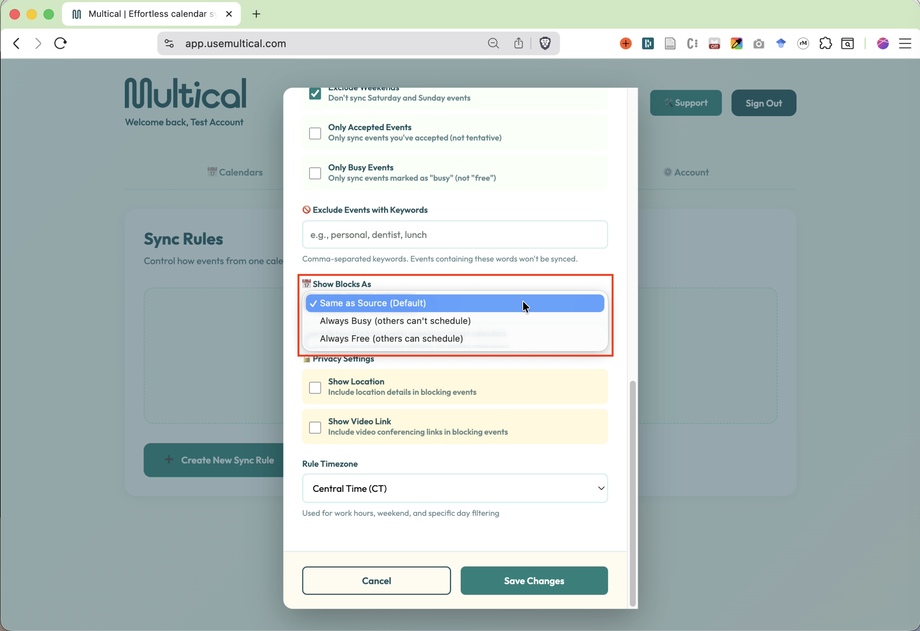
Choose how what busy/free status blocks show up as on the target calendar.
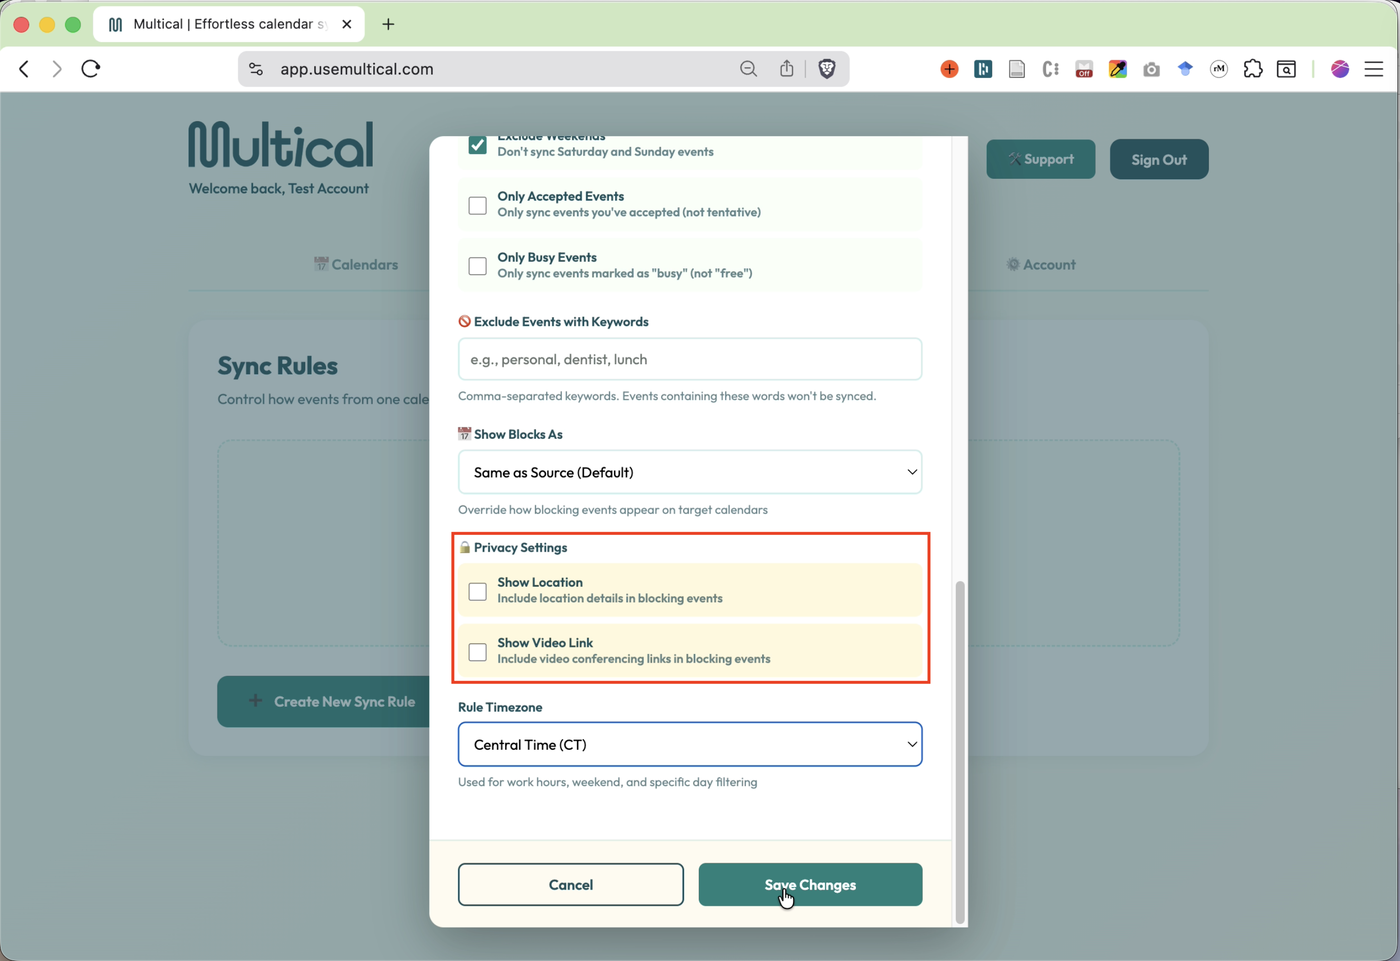
Decide whether to show the physical location or video link in events blocked on the target calendar.
Note: This option only appears for “Title Only” or “Full Details” visibility mode.
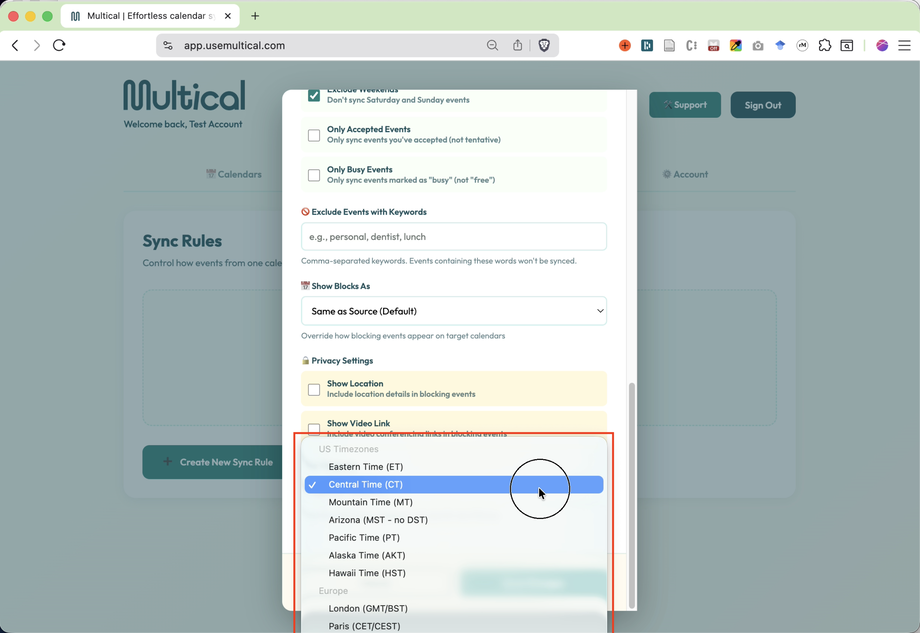
Select your time zone.
Save your changes.
Congrats! You’ve made your Sync Rule.